Good Afternoon! In the February release, Your Next Stamp released this beautiful
Butterfly Gift Box Die Set.
It is a perfect little box for gifts, weddings and special favours!
Here is a tutorial of how to put the box together:
For the purpose of the tutorial I used four different colours of cardstock but you would probably use all the same or two colours.
Start by cutting two pieces of cardstock with the box base die.
And one of each of the butterflies. (So you have four pieces all together.)
Crease the folds on the base die so you have two bottom folds and one side fold on each piece of cardstock.
Adhere strong tape onto the two side flaps.
Then peel off the tape, stick the two base pieces together and turn over.
Peel the second tape and stick those sides together to form a box shape.
Fold two of the sides in and place tape onto one of the inner flaps and adhere the bottom together.
This will form the base and bottom of your box!
You should have two butterflies.......place them so that the bottom and top slits face each other. (like above).
This will be how you want your butterfly to look at the end.
( So just make sure you have them the right way)
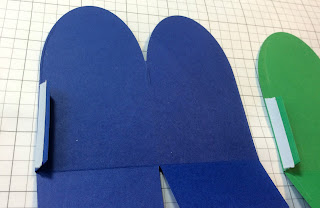
Put adhesive tape on the outer part of the flaps of the butterflies (both sides).
Then stick them to the inner part of the base box.
Fold in the other two flaps....and bring together the two butterflies (along the slits).
The final box should look something like this!
Here is a box using all the same cardstock and patterned papers from YNS!
Thanks for taking the time to read my tutorial!
Have a great day,
Sue


No comments:
Post a Comment